


By James Sanders
In a pre-COVID world, one of the best things about grading was undoubtedly the reward stickers involved. The designs were fun AND motivated students who might’ve struggled in the classroom.
In the virtual classroom, you can’t use your traditional stickers anymore, but that doesn’t mean you can’t use virtual reward stickers. Virtual stickers are just as enjoyable and you can even make your own stickers for free on easy-to-use sites like Canva!
Here’s how:
1. Make a Canva account
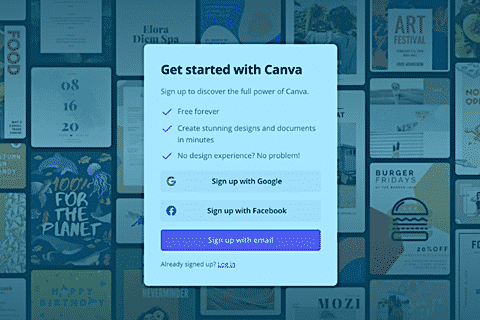
There are three different Canva plans you can choose from: free, pro, and enterprise. When you’re first starting out in the world of design and just need to create a few basic things, a free account is all you really need. You get access to tons of great templates, images, and design elements. If you want more capabilities like making your designs transparent or creating a brand kit, consider upgrading to a paid account.
2. Start a sticker design
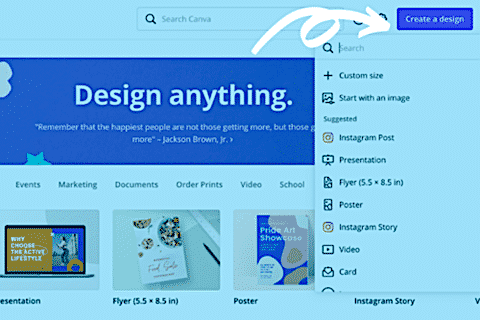
When you login to your account, click the “Create a design” button in the upper right corner of your window. A drop-down menu of design board sizes will appear. For example, if you’re posting on Instagram, Canva has already created the optimal sized board for you to build your design, “Instagram Post.” We recommend creating your own “Custom Size.” You’ll get the option to size your design board with pixels, cm, mm, or inch. Depending on your needs, type in the appropriate size for your designs. For our example, we’ve used a 3 x 3-inch template.
3. Use Canva’s free elements
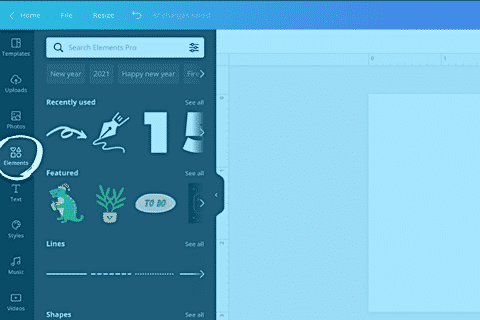
Once you create your design, you’ll be transported to this screen where there’s a menu full of different design tabs to explore. If you have more time, we encourage you to explore all the great tools Canva gives you. When you’re in a pinch, just hop on over to the “Elements” tab as circled in the photo.
You can explore all of the basic elements like circles and lines to create your own designs easily. There’s also a separate “Text” tab right below the “Elements” tab to add in your own personal messages.
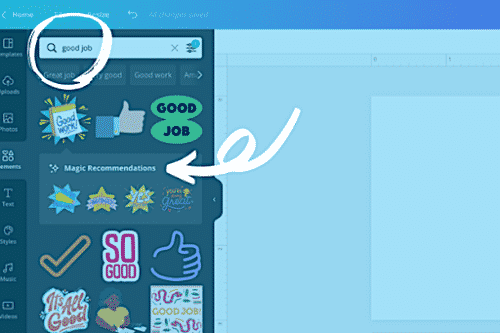
To find cute reward stickers that you can use when grading assignments, type common encouragement phrases like “good job” into the search bar. Scroll through the designs to find one you like. Click it and Canva will “magically” recommend other stickers in the same style. Now you have a lot of options for your collection of virtual teacher stickers.
4. Re-size & re-color your sticker

When you click any design, it will automatically appear on your board. Usually, it’ll be small, but we want the image to fully cover the board. With your reward sticker selected, a box will appear around it with small white circles attached to each corner. Click and drag a circle all the way to the appropriate corner of the board to fully increase the design’s size. If desired, you can also change the colors of most Canva elements. In the example above, we can change quite a few colors as indicated in the upper left corner.
Click a colored square and color options will appear in the left-hand menu. There, you can choose whatever color you like.
5. Download your free reward sticker
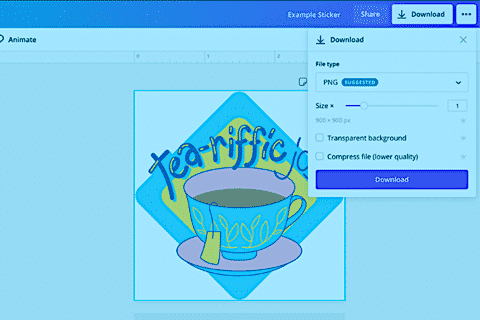
When you’re done editing your reward sticker, click the “Download” button in the upper right corner. Canva’s download settings are pretty straightforward and they even suggest what file type your image should be downloaded as. For designs like stickers, PNG is the best option.
In the download menu, you’ll see the option “Transparent background,” which will completely take away the white background that the design doesn’t cover. Transparent means only the sticker design will remain. However, this option is only for paid accounts.
For free accounts, download your sticker as normal. Even with the white background, these stickers are pretty cute.
6. Create more stickers
You can easily create more stickers to download on the same page. On the upper right side of your design board, you’ll see an icon that has a plus sign. Click that and Canva will create a new page with the same board dimensions. Now you input more designs and resize accordingly.
If you want a different board size, you’ll have to repeat the steps starting from step 2 and select the new dimensions you want. And you’re done! You’ve got your cute, virtual teacher stickers to put on your students’ assignments.
7. Use your stickers
Inserting stickers onto your students’ PDF assignments is simple. You can use the free PDF editor, smallpdf. Choose the assignment file you want to open and a toolbar will appear at the top of the browser. Our example PDF is blank (below) but you should be seeing your assignment.

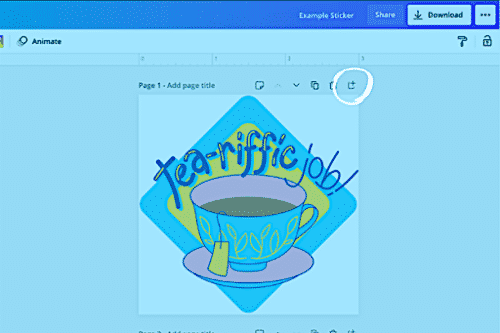
Add your image by selecting the last tool in your toolbar. You’ll be prompted to choose what image you want to input. Once you select your desired image, you can resize and drag it just like in Canva.
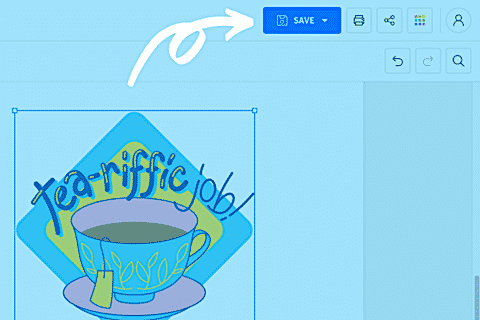
Then select the “SAVE” button in the top right corner of your browser. Smallpdf will automatically download a new PDF version of your file that includes the sticker.
About the Author

Further Reading
- Red Tricycle – Everything LA Parents Need to Know About Pandemic Learning Pods
- The Economist – Disrupted schooling will deepen inequality for American students
- The New York Times – Online Schools Are Here to Stay, Even After the Pandemic

